Presets
Presets are RetroLookPreset data assets that bundle a complete look. Applying one writes its values into MPC_Retro, so the whole style changes in one click. Four ship with the plugin, under /RetroRender/Presets.
| Default (no look) | PS1 | PS2 | PS2 + CRT |
|---|---|---|---|
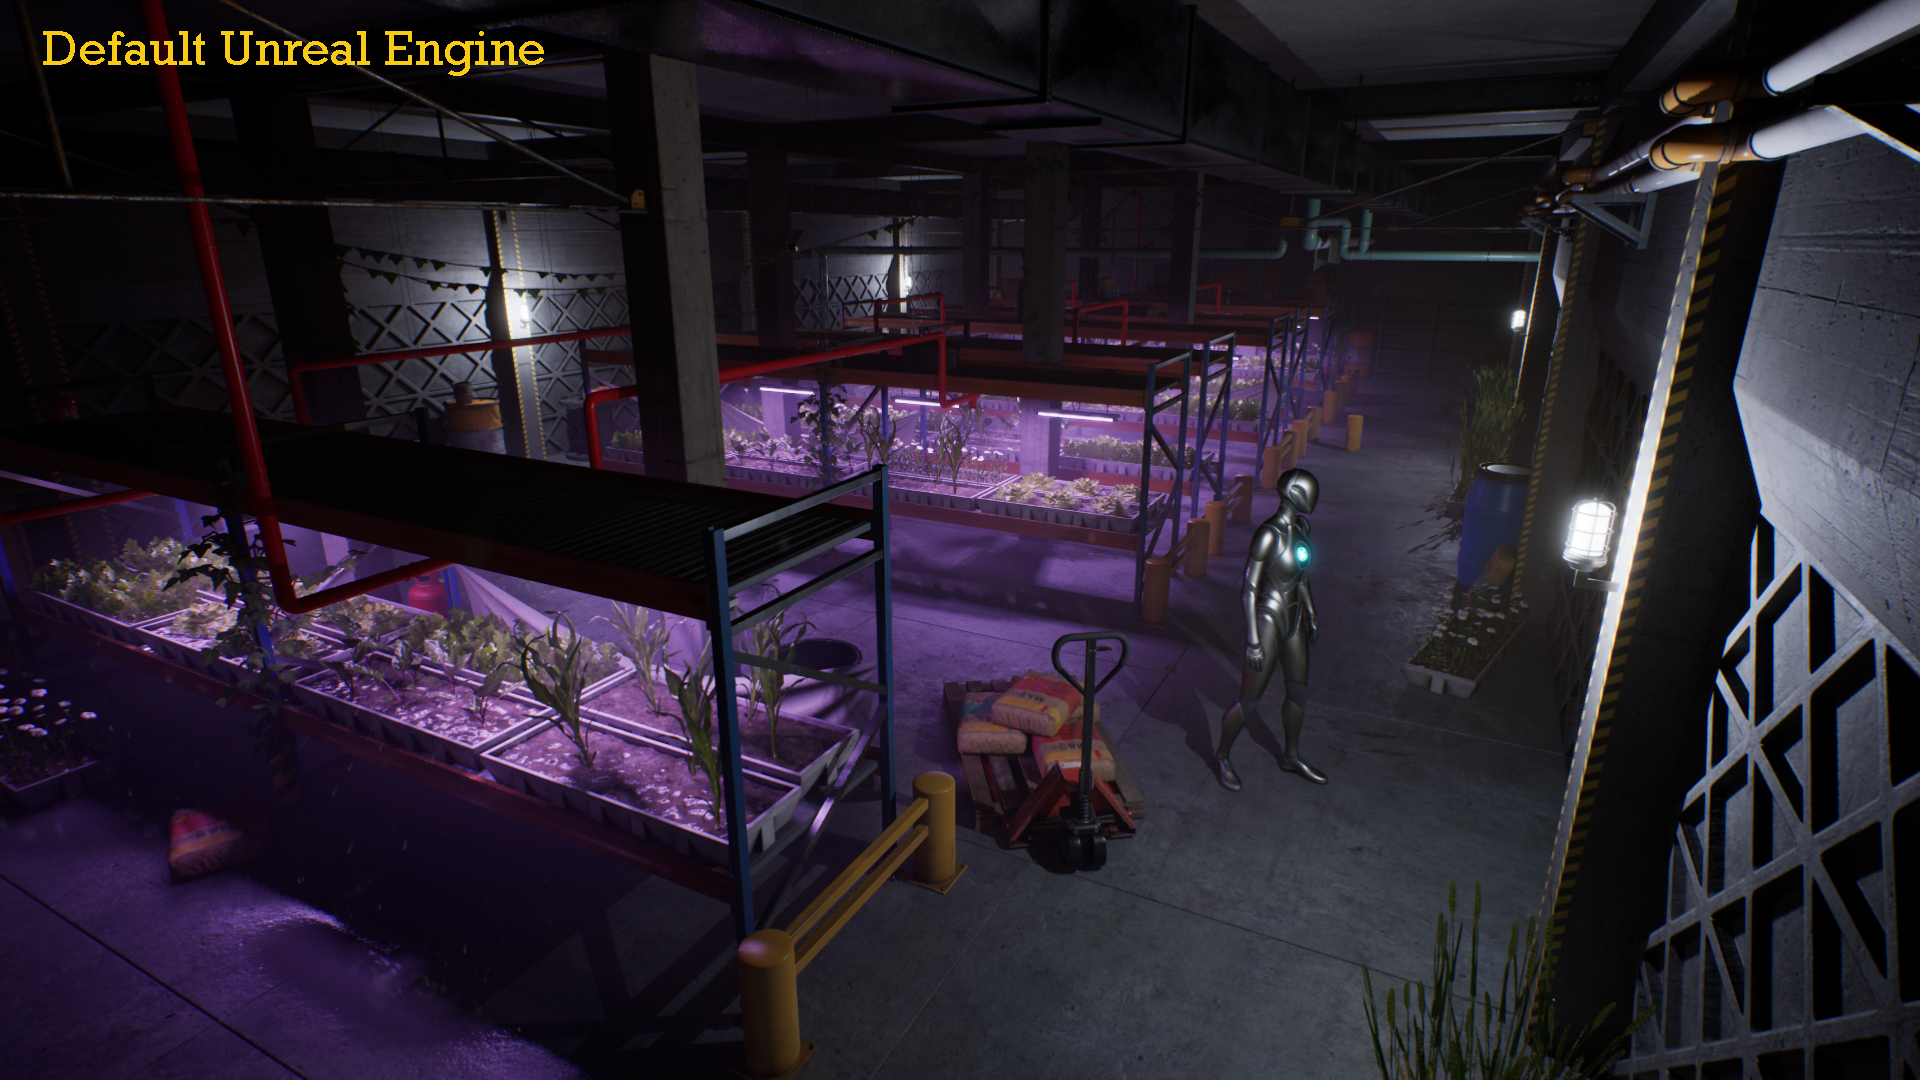 | 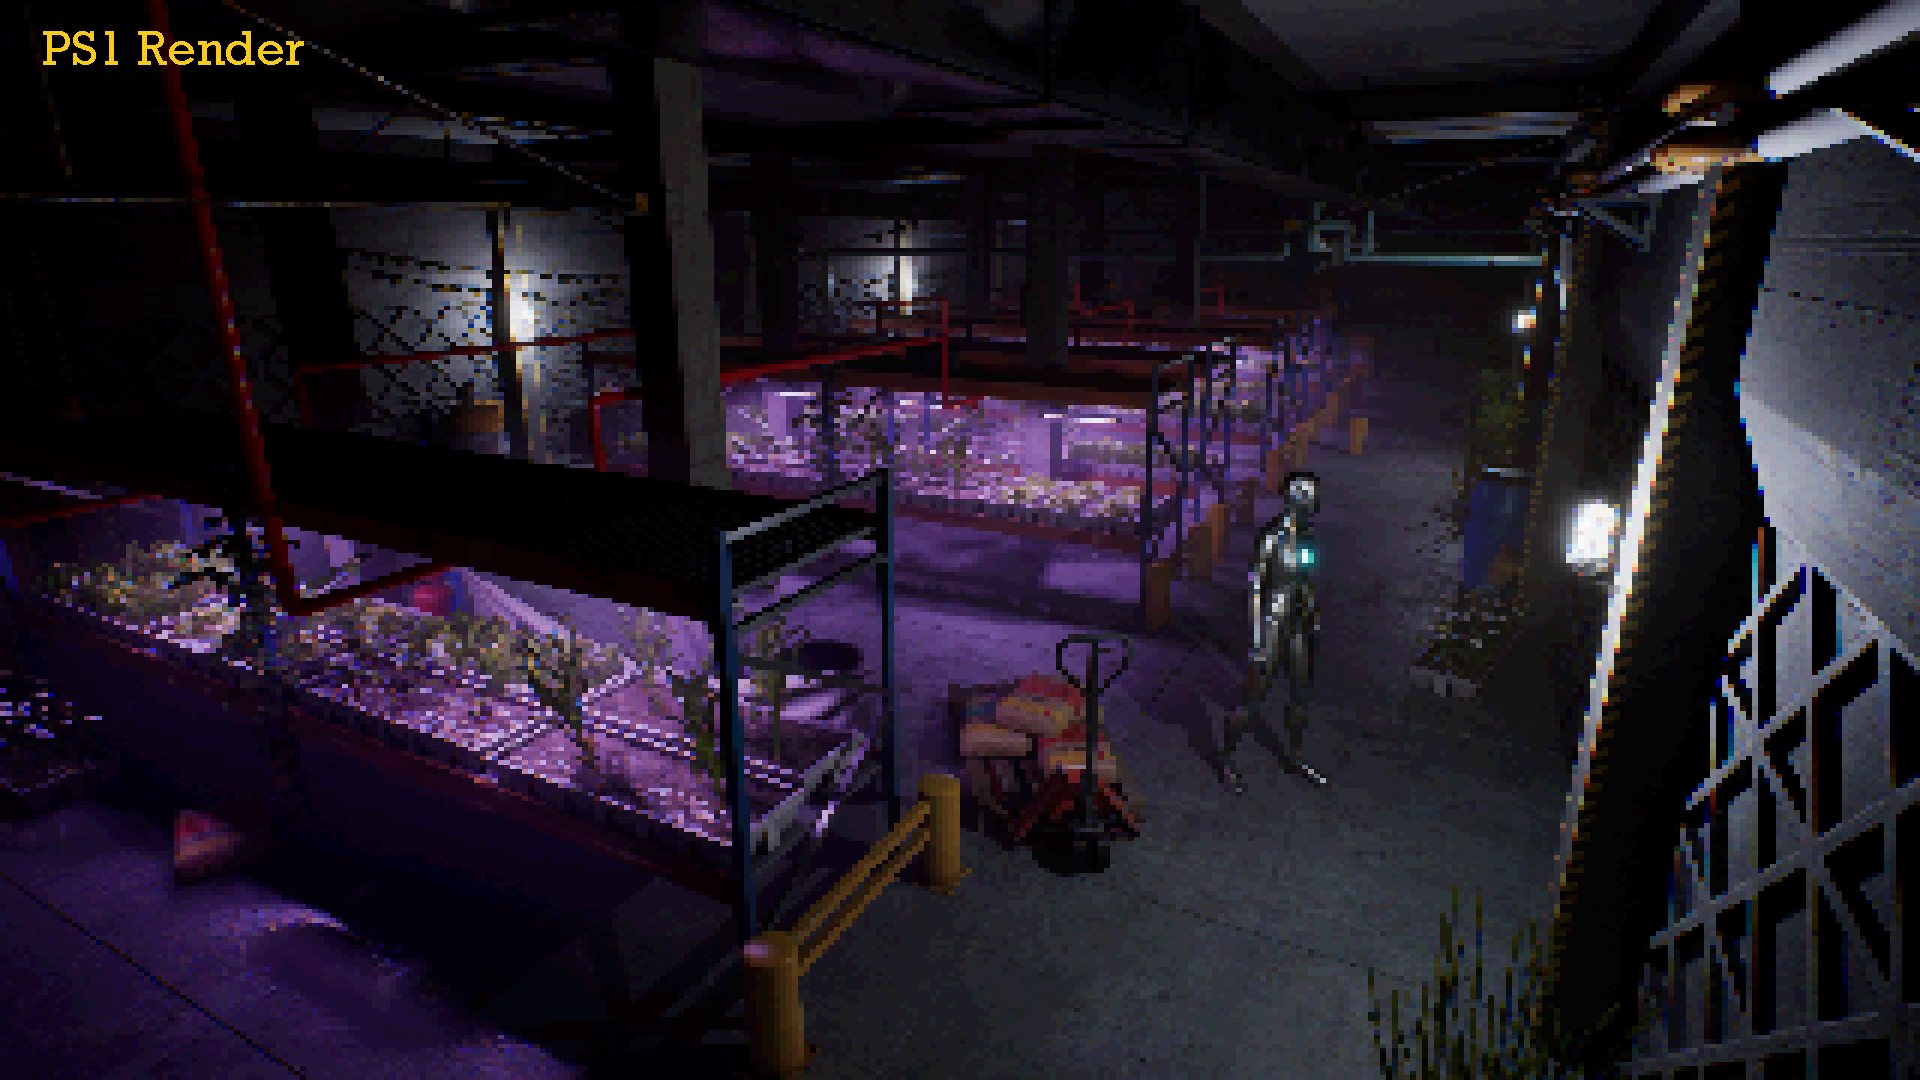 | 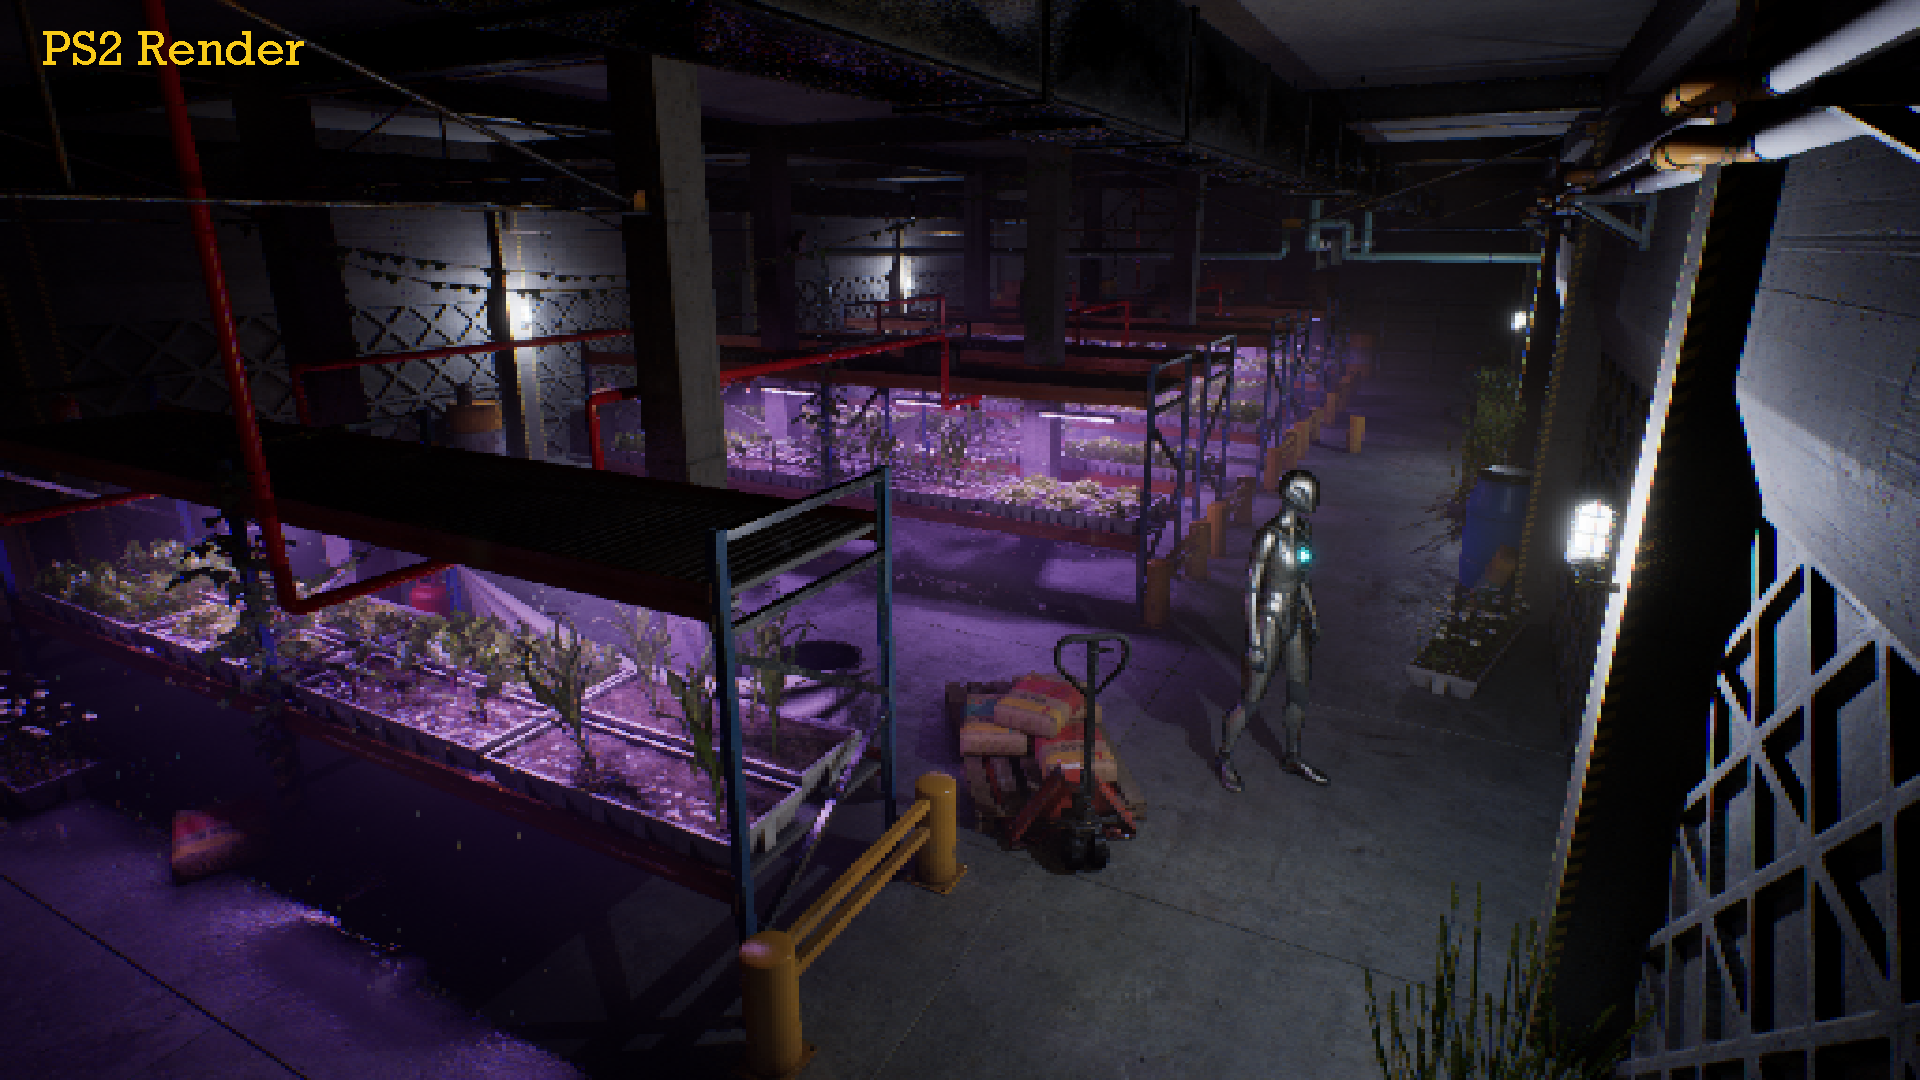 | 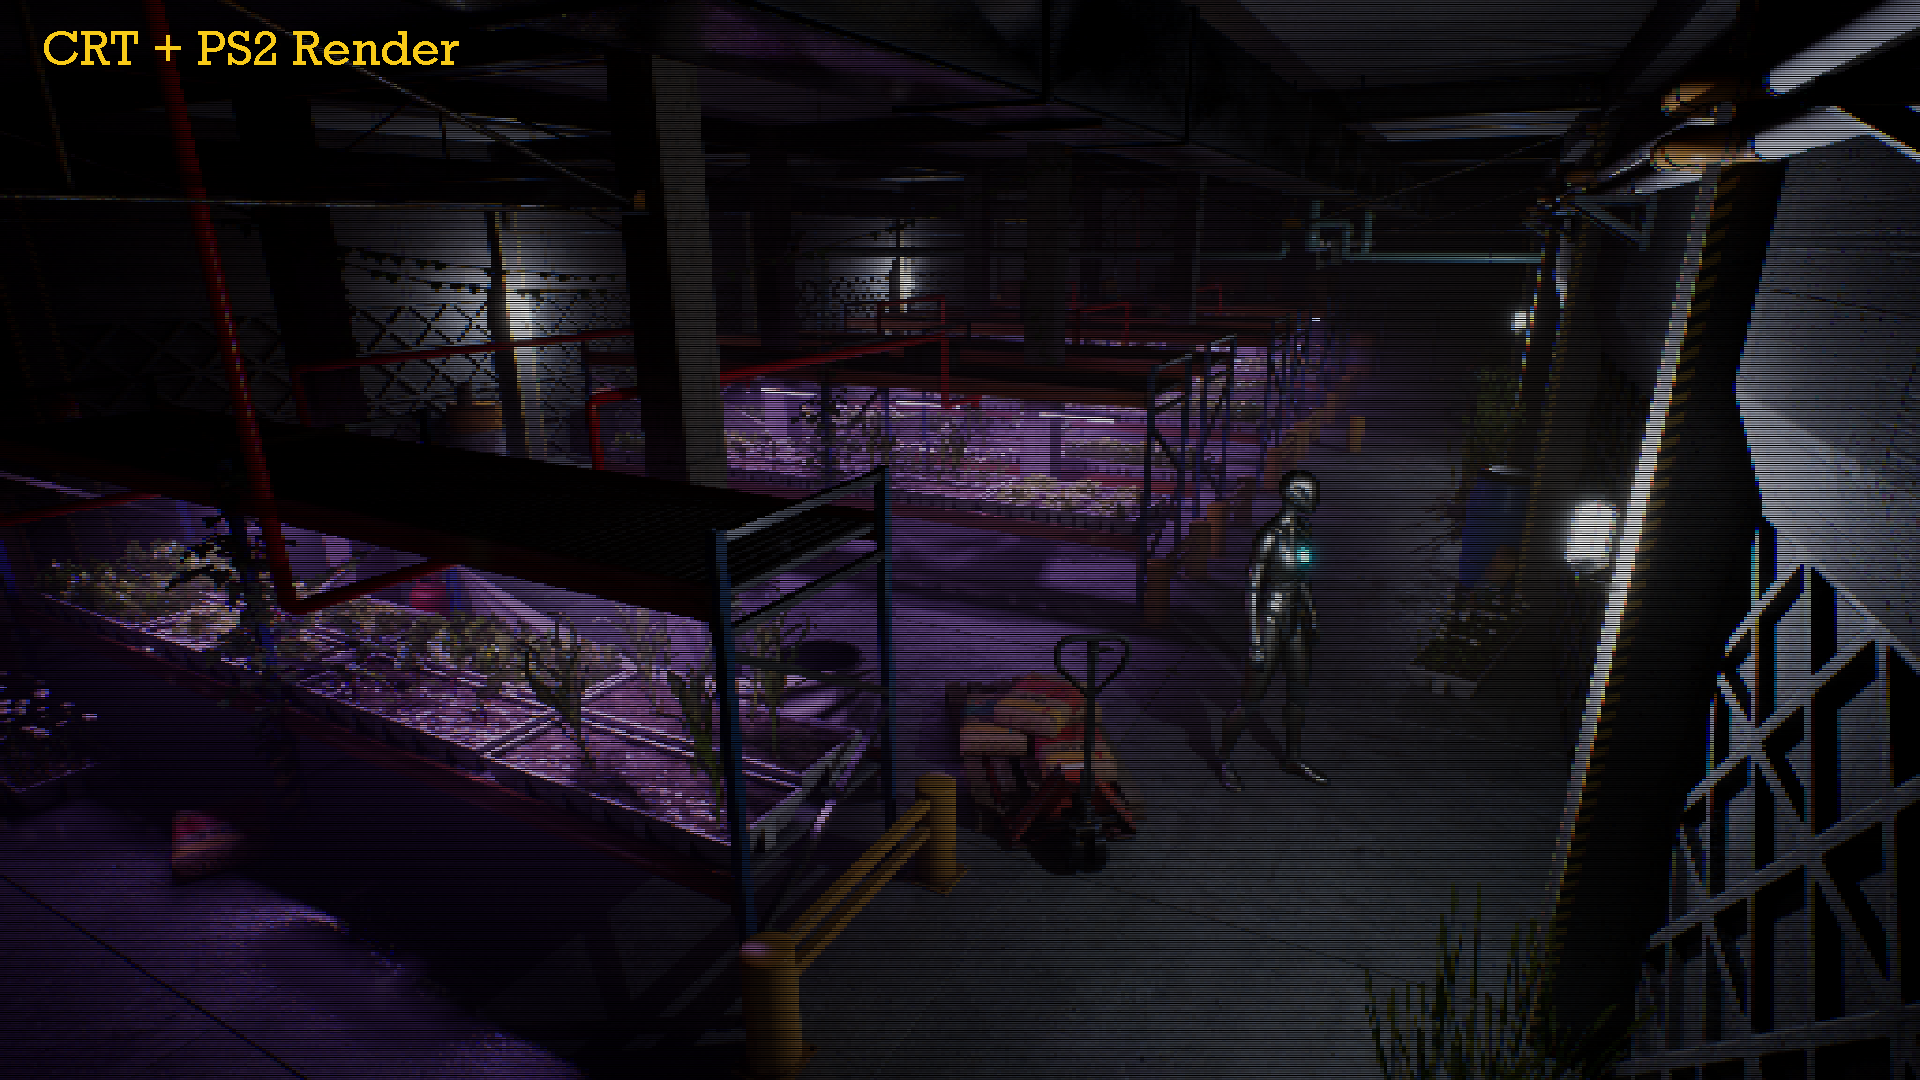 |
Applying a preset
- Open Tools → RetroRender → Look tab.
- Set Look Preset to one of the presets below.
- Click Apply Look Preset.
The values are pushed into MPC_Retro and every material that reads the collection (the post-process and masters) updates live.
The four presets
| Preset | Vertex snap | Colors | Resolution | Dither | Notes |
|---|---|---|---|---|---|
| DA_Preset_PS1 | 160×120, strong | 32 levels | 320×240 | Strong | Marked affine + wobble. The classic PlayStation look. |
| DA_Preset_N64 | Light | 32 levels | 320×240 | Light | No wobble, softer image. |
| DA_Preset_PS2 | Off | 256 levels | 512×448 | Subtle | Cleaner — just low-res. |
| DA_Preset_CRT | Off | 256 levels | 320×200 | Ordered | Scanlines enabled — CRT/TV feel. |
Creating your own preset
- Right-click in the Content Browser → Miscellaneous → Data Asset, and pick RetroLookPreset.
- Set the fields (see the table in Retro Look).
- Assign your
MPC_Retroin Target Collection (or leave empty to use the default). - Select it as the Look Preset in the panel and Apply Look Preset.
Preset fields
| Field | Meaning |
|---|---|
| Snap Resolution | Vertex-snap grid (xy). |
| Snap Strength | Wobble intensity (0–1). |
| Affine Amount | Affine-UV amount (0–1). |
| Color Levels | Posterization levels per channel (RGB). |
| Dither Strength | Ordered-dither intensity (0–1). |
| Pixelate Resolution | Post-process pixelation resolution (xy). |
| Enable Scanlines | CRT scanline pass on/off. |
| Target Collection | The MPC_Retro this preset drives. |